Photo Logging Accuracy: 9 Tips for Better Scans
Want your AI calorie counter photo scans to be spot-on? These 9 practical tips help you take better food photos, improve food recognition, and get more reliable portion estimates so you spend less time fixing logs and more time hitting your goals.
If your food photo scans keep guessing wrong, you are not alone. Mixed meals, sauces, shadows, and warm indoor lighting can turn an easy log into a frustrating redo, and small mistakes add up in your calories and macros. In this guide, you will learn a simple, repeatable way to take better photos in seconds, from framing and focus to portion cues and backgrounds. You will also get quick fixes for those moments when the AI is unsure.
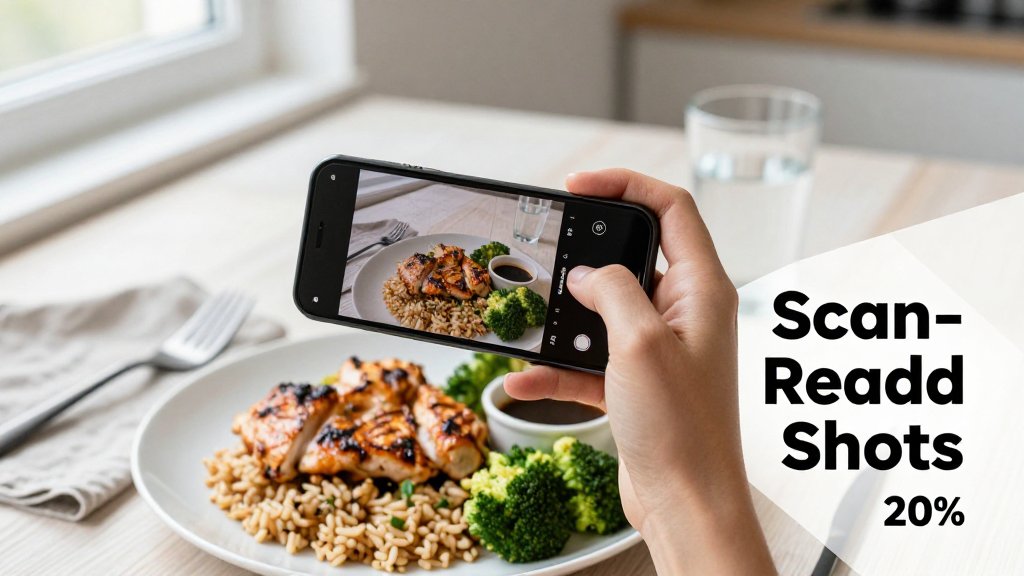
Start with a clean, scannable food photo
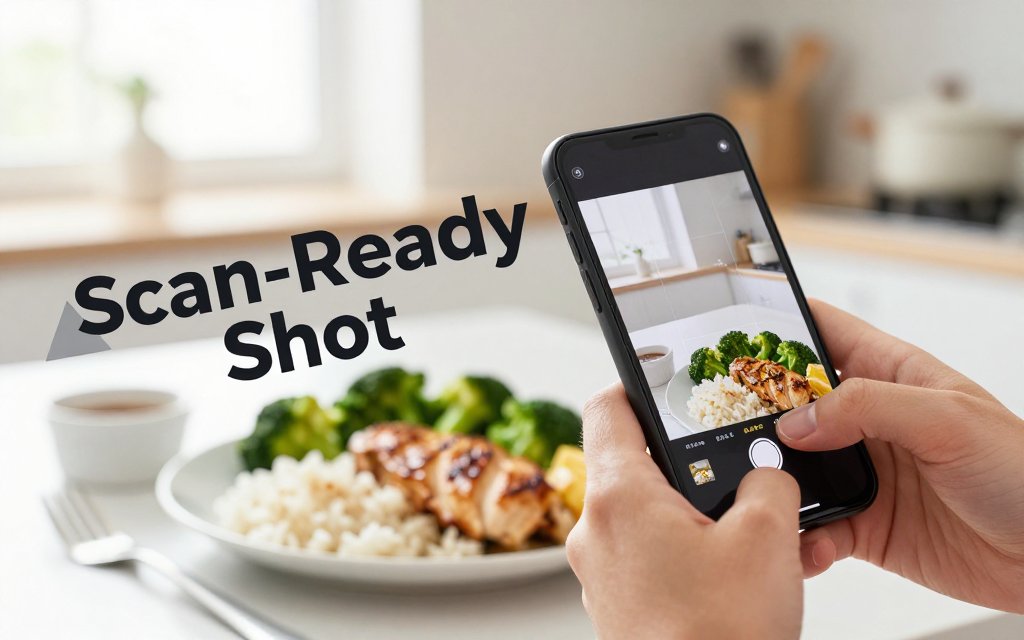
Your scan accuracy depends more on photo clarity than on the food itself. If the image is blurry, dark, or full of glare, the app is forced to guess, even if the meal is something simple like chicken, rice, and broccoli. That is not just a nutrition app problem, it is a computer vision problem. Research on image recognition consistently finds that blur and other degradations reduce recognition performance, because fine details disappear and edges smear together (see blur hurts recognition). The good news is that you can fix most of this in under 10 seconds, before you ever hit “log.”
Think of photo logging like a quick “pre-flight check”: light, focus, framing, then a fast reality check on portions. Photo scanners are great at spotting common foods (pasta, grilled chicken, salsa, avocado), but they cannot reliably infer everything that matters. A top-down photo cannot always tell if that bowl has 1 cup of rice (about 200 calories cooked) or 2 cups (about 400 calories), or whether the creamy sauce is a 1 tablespoon drizzle (about 50 to 100 calories) or a heavy pour (200+ calories). For meals like bean salads, the ingredients can look similar, so pairing a clean photo with a simple portion cue and a quick description helps a lot. If you want a practical example of why density matters, check dense bean salad macro math.
One more expectation setter before the tips: scanners can recognize what they can see, but they cannot “see” what is hidden. If the cheese is under the lettuce, if the dressing is already tossed in, or if the oil is mixed into the pasta, the app may undercount unless you help it. When in doubt, snap the photo first, then add a quick note like “2 tbsp ranch” (roughly 120 to 140 calories) or “1 cup cooked pasta” (roughly 200 calories).
If your photo is bright, sharp, and close, you have already done most of the work. The scanner can guess foods, but it cannot guess portions. Give it clear texture and a visible size cue.That tiny habit is usually faster than fixing a wrong match later.
Tip 1: Use bright, even light and skip harsh shadows
“Even light” just means the whole plate is lit similarly, with no dark corner hiding the food and no bright hotspot blowing out details. The easiest setup is near a window in daylight, or under an overhead kitchen light, with your phone facing the light source so the food is illuminated from the front. Common failure cases happen in restaurants: backlit booths where the plate is dark, or spotlight lighting that makes white rice look like cauliflower, and then the app tries to match the wrong thing. Also watch for the shadow of your hand or phone creeping across the bowl. Simple rule: if you cannot clearly see texture like rice grains, shredded chicken fibers, or noodle edges, the AI probably cannot either.
Tip 2: Hold steady, tap to focus, and fill most of the frame
Before you shoot, tap your screen on the main item (not the table, not the drink, not the napkin). Then hold your phone about 10 to 14 inches away so the camera can resolve texture, and so you do not distort the plate with an extreme close-up. Aim to fill about 70 to 85 percent of the frame with food. Tiny food in the distance, blurry edges, or a lot of background clutter increases wrong matches. It sounds silly, but a dark, out-of-focus bowl of turkey chili can get misread as chocolate pudding, especially if the lighting is warm and the bowl is glossy. Taking one extra second now usually beats correcting ingredients, calories, and macros later.
Tip 3: Give the camera a portion clue (it cannot read your mind)
Even with a perfect photo, portion size is the toughest part because the camera sees a 2D scene and has limited scale. Help it with a quick cue: keep a fork or spoon in the shot, or include the rim of the standard bowl you always use at home. For a salad bowl, spread the toppings a bit so chicken, chickpeas, and shredded cheese are visible instead of piled under greens. For a burrito bowl, try one photo before mixing so the app can separate rice, beans, steak, and guacamole, then mix and eat. For pasta, take the photo before you add extra parmesan, and if it is saucy, angle slightly so the height of the noodles is visible. If you have health concerns or need specific nutrition targets, consider checking with a registered dietitian or your doctor.
Get portion size right with simple visual anchors
Most “bad scan” logs are not caused by the app mistaking chicken for tofu, they are caused by the photo giving no reliable sense of scale. Research on image-based dietary assessment consistently shows that people tend to do better at identifying foods than quantifying portions. One example is a study of dietetics students and interns, where serving size estimates lagged behind food identification accuracy. Your takeaway for photo logging is simple: you can improve accuracy fast by giving the camera a clear size anchor, then showing thickness when it matters. That is how you reduce calorie drift without obsessing over perfection.
Portion errors get expensive quickly because many “healthy” foods are calorie dense in small volumes. Peanut butter is the classic example: a thick spoonful can quietly become 2 tablespoons, which is about 190 calories instead of about 95. Olive oil is even sneakier because it spreads thin: a quick “glug” can be 1 tablespoon (about 120 calories) when you meant 1 teaspoon (about 40). Granola is another common trap: a bowl that looks modest from above can jump from 1/4 cup to 1/2 cup, which can double calories. Use the table below as a quick mental calibration for common swings.
| Food | Small | Large |
|---|---|---|
| Peanut butter | 1 tbsp 95 | 2 tbsp 190 |
| Olive oil | 1 tsp 40 | 1 tbsp 120 |
| Cooked rice | 1/2 cup 100 | 1 cup 200 |
| Granola | 1/4 cup 130 | 1/2 cup 260 |
| Chicken thigh | 3 oz 180 | 6 oz 360 |
Tip 3: Add a scale cue on purpose, not by accident
Help your scan by adding an intentional reference object, every time. A fork or spoon is great because it is familiar and usually in the frame anyway, but place it clearly next to the food, not half-hidden under lettuce. A standard 9-inch dinner plate is another strong anchor if most of your meals are plated. If you need a “universal” reference, a clean, credit-card sized item can work if you keep it safely away from the food (no contact, no splashes). Your hand is a last resort because hand size varies, but it is better than nothing in a pinch.
Consistency beats cleverness. If you eat breakfast at home, pick one bowl and one spoon and keep using them. Over time, your scans become more predictable because the visual anchor stays the same, even when the food changes. This is especially helpful for “mound foods” like cooked rice and granola. A half cup of cooked rice looks very different in a wide bowl versus a narrow one, and granola can pile up in a way that makes the portion look smaller from a top-down shot. The same dishware reduces those optical tricks and keeps your logs steadier.
Tip 4: Show height and thickness with a second angle when needed
One photo is often enough for flat foods, but it can fail hard on tall, stuffed, stacked, or deep-bowl meals. Think: a burrito, a double-decker sandwich, a thick slice of casserole, a pile of pancakes, or chili in a deep bowl where half the volume is hidden under toppings. In those cases, take two quick photos: one top-down shot for ingredients (chicken, rice, salsa, cheese) and one at about a 45-degree angle so the app can “see” height. This is also where hidden calories usually live, like melted cheese under toppings or rice buried under stir-fry.
Try this two-shot routine: take one top-down photo, then tilt your phone to about 45 degrees and snap again. The second angle helps your app judge depth for rice, pasta, burritos, and casseroles.
Tip 5: Avoid misleading containers that hide volume
Containers can accidentally lie. A tall glass makes a small pour of smoothie look like a full serving, while a wide mug can make the same amount look skimpy. Deep bowls hide food below the rim, which is why rice, oatmeal, and yogurt bowls often get under-logged. Even for chicken thighs, a tight container can press pieces together and make it hard to see how many ounces you really have. If you can, plate the food or spread it slightly so the boundaries are visible. If you cannot re-plate, add the second angle and include the spoon for scale.
Accurate portions also make your progress signals easier to interpret. If your logs are off by 150 to 300 calories a few days a week (easy to do with oils, nut butters, and granola), the scale can look “random,” even when your habits are improving. If you are trying to separate normal fluctuations from real progress, pair better photo anchors with water weight vs fat loss decoding so you do not overreact to day-to-day noise. For any health concerns or major diet changes, check in with a doctor or registered dietitian, especially if you have a medical condition.
Log mixed meals and restaurant food faster
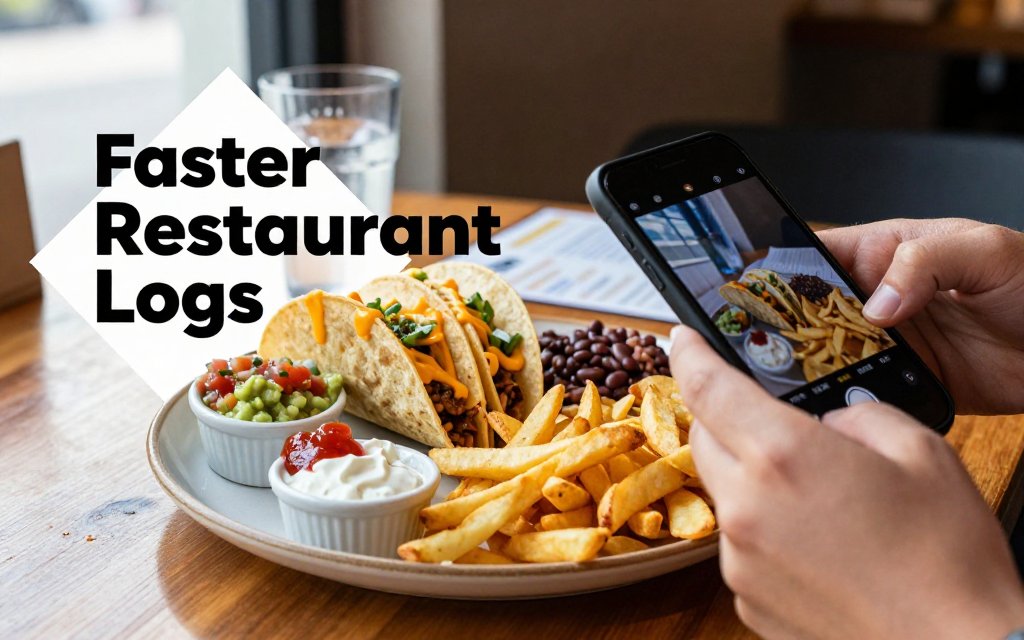
Mixed meals are where photo logging usually gets shaky, not because you did anything wrong, but because one picture can hide a lot of “what exactly is that?” Research comparing food image recognition platforms shows that mixed dishes are the toughest category, with estimates varying more than for single-item foods, which is a good reminder to add a little extra context when your plate is complicated. See the mixed-dish comparison study for a concrete example of how much results can differ.
Here is a simple rule that saves time: the messier the meal, the more you should guide the scanner. Restaurant plates, combo meals, sauces, and bowls are full of “hidden” calories and macros. A taco plate is a perfect example: two tacos can be easy, but add rice, beans, chips, guac, sour cream, and queso, and that “one photo” could mean 650 calories or 1,200 calories. The goal is not perfection, it is fewer corrections later. If you help the scan understand what is separate vs mixed, you usually get a cleaner first draft, then you just adjust portions.
Tip 5: Separate items visually before you shoot
Small moves help a lot. Spread fries into a single layer instead of a pile so the scanner “sees” quantity better. Move sauce to the side, even if it is only one or two spoonfuls, because sauces are calorie dense (for example, 1 tablespoon of ranch is often around 120 to 150 calories, and 1 tablespoon of olive oil is about 120 calories). With a taco plate, separate the components: angle the tacos so the filling is visible, keep the rice and beans in their own spaces, and pull chips away from the tacos so chips do not get mistaken for taco shells.
“Pretty plating” is not always “scannable plating.” The most Instagrammable meals are often the hardest to identify because everything is buried under cheese, dressing, or a drizzle. For a sushi combo, spread pieces so the roll types are distinct. If your tray has an 8-piece California roll, a 6-piece spicy tuna roll, plus a side of ginger and a cup of miso soup, a quick rearrange helps the scan separate roll types instead of calling everything “sushi.” For a stir-fry, keep protein visible: chicken and broccoli in sauce reads differently than a glossy brown bowl where every piece looks the same.
For a smoothie, do not rely on the cup photo alone if it is an opaque blend. A 16 oz smoothie made with banana, Greek yogurt, and berries might land around 250 to 400 calories, but add 2 tablespoons of peanut butter (often about 190 calories) and honey, and you can jump to 500 to 700 fast. If you can, place the ingredients nearby before blending, or at least keep the bottle label in view (more on that in Tip 6). For a cafe breakfast sandwich, cut it in half so the inside is visible. Egg and cheese on an English muffin is very different from egg, cheese, bacon, and aioli on a croissant.
If your plate looks like a food pile, give the scanner a little help. Pull sauces aside, show the inside of sandwiches, and grab the menu name. Two quick seconds of context can save five minutes of edits later.
Tip 6: Capture clues like packaging, labels, or a menu line
Sometimes the fastest scan is not a “better food photo,” it is a “better clue photo.” Packaging and labels reduce guesswork, which means fewer manual corrections. This is especially true for protein bars, bottled drinks, and frozen meals where the brand and flavor matter. A “chocolate protein bar” could be 180 calories with 20 g protein, or 280 calories with 10 g protein, depending on the product. If you are having a bottled latte, sports drink, or a ready-to-drink protein shake, take the food photo, then take a second quick shot that clearly shows the front label (and the size, like 12 oz vs 16 oz).
Restaurant meals have their own version of “labels,” the menu name. If your order is a “Spicy Tuna Crunch Roll” or a “Southwest Chicken Bowl,” those words are useful context. Snap the plate, then snap a menu line, a receipt line, or even a takeout sticker that shows the item name. That extra context helps the app match a more specific entry instead of a generic one, which usually speeds up logging and macro tracking. If you have health concerns, allergies, or medical dietary needs, it is always smart to confirm ingredients and portions with the restaurant and check with your doctor for personalized guidance.
Fix common scan mistakes in under 30 seconds
Fast, consistent logging beats perfect logging, especially if it prevents the big calorie misses that quietly stall progress. Evidence reviews for nutrition behavior change have found that diet self-monitoring is linked with better weight outcomes, which is a fancy way of saying that showing up regularly matters more than getting every gram exact. If your scan is close, treat it like a quick quality check: confirm the main foods, fix the most calorie-dense parts, and move on. If you have medical concerns or a condition that requires precise tracking, check with your doctor or registered dietitian. For everyone else, the goal is fewer large errors, repeated day after day. (nesr.usda.gov)
Tip 7: Correct the highest-calorie item first
Use the 80-20 move: if something looks off, correct the calorie-dense items first. Oils, dressings, cheese, nuts, nut butter, mayo, creamy sauces, and sugary toppings can swing your total far more than swapping one lean protein for another. A concrete example: 1 tablespoon of olive oil is about 120 calories, and a “heavy pour” on a salad or pan often becomes 2 tablespoons (about 240 calories) without feeling like more food. That single tweak can matter more than choosing chicken breast versus chicken thigh in the same bowl, because the oil is pure fat calories packed into a tiny volume.
If the scan labels your salad as “mixed greens” but misses the dressing, do a 10 second fix by searching and adding “ranch dressing, 2 tbsp” or “vinaigrette, 1 tbsp,” then adjust if you know it was lighter or heavier. Same idea for coffee drinks: if the scanner catches “cold brew” but not the splash of half-and-half plus syrup, the fastest accuracy win is editing those add-ins. In CalMeal (or any tracker), you can also save a corrected combo as a meal so tomorrow takes one tap. The best habit is always the same: fix the highest-calorie line item first, then stop fiddling.
Recipes are where “close enough” can turn into repeated errors, so give them one quick setup the first time, then reuse forever. If you cooked turkey chili, for example, let the scan identify the bowl, then do a fast manual edit that captures the calorie drivers: the amount of oil used to saute, any cheese on top, sour cream, and whether you used 93% lean or 80% lean ground turkey. Next, save it as a recipe with the total servings (like 6 bowls). After that, even if the photo scan is slightly off, you can swap in your saved recipe and adjust only the serving size, which is usually the real issue.
FAQ: How do I take food photos for calorie tracking that scan best?
Try this repeatable checklist in one breath: use bright, even light; keep a clean background; let the food fill most of the frame; take a top-down photo for easy identification; take a 45-degree photo to show thickness; include a size cue like a fork, spoon, or your hand; and snap a second photo if it is a mixed meal with toppings. The secret is not a fancy setup, it is doing the same simple routine at home, at work, and at restaurants so the scanner sees consistent angles and lighting.
FAQ: Why does my nutrition tracker misread similar foods like rice, cauliflower, and oats?
Most misreads come from four photo problems: lighting color cast (yellow kitchen bulbs), blur, steam, and sauces that change surface texture. Fix it fast by stepping into neutral light near a window, waiting 30 seconds for steam to clear, tapping to focus, and taking one close-up that shows texture clearly. A common example is oatmeal versus grits versus rice pudding, they can look identical when glossy and blurred. A tight texture shot plus a spoon in frame for scale usually makes the difference, and if it still guesses wrong, do a quick name swap without redoing the whole log.
FAQ: How should I log mixed meals with a photo calorie scanner?
The fastest method is two photos, one top-down and one angled, then a quick component check: confirm what is in the bowl, then only split it into parts if that saves time overall. Bowl meals, salads, and stir-fries are perfect for component logging because sauces and toppings drive calories. A restaurant example: a burrito bowl might need separate entries for rice, protein, beans, cheese, sour cream, and guacamole if your portion estimate is drifting, especially if the scoop sizes were generous. Once you do it once, save it as a custom meal so the next visit is a 15 second repeat.
Ready to start tracking your nutrition today? Download CalMeal for free and take the guesswork out of calorie counting with AI-powered food recognition. Snap a clearer photo, log faster, and stay consistent without overthinking every meal. Get CalMeal now on iOS or Android, then put these scanning tips to work today.
Start Tracking Your Nutrition Today
Download CalMeal for free and take the guesswork out of calorie counting with AI-powered food recognition.