Costco Rotisserie Chicken Macros, Skin On vs Off
Costco rotisserie chicken can be a macro-friendly shortcut, but your calories can swing a lot depending on skin, cut, and how you measure. This guide gives simple, repeatable logging rules for breast vs thigh, skin on vs off, serving sizes by weight, and sodium tips so the scale does not spook you.
Costco rotisserie chicken can feel like a calorie-tracking cheat code, but it is also one of the quickest ways to log the wrong macros. A few bites of skin, a different cut, or a loose estimate can swing calories and fat more than you think. In this guide, you will learn how skin-on compares to meat-only, why breast and thigh macros differ, and simple portion rules you can use every time, plus fast weighing shortcuts and a realistic look at sodium.
Costco rotisserie chicken macros, the quick truth
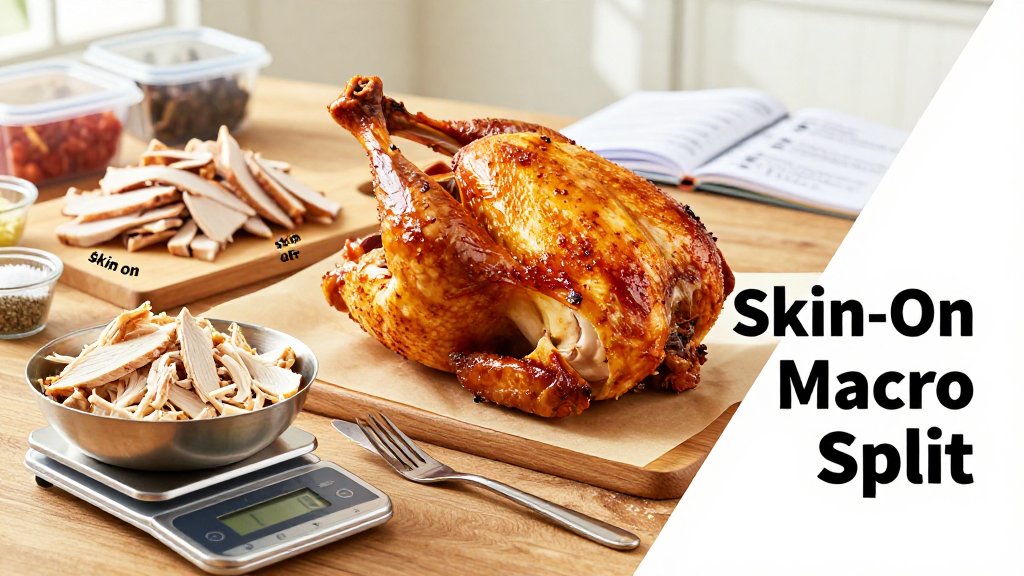
Costco rotisserie chicken is a macro-tracker’s best friend and biggest source of calorie confusion. The confusion is not because the chicken is “mysterious.” It is because people log it as one single food, even though one bird has multiple cuts (breast, thigh, wing), plus skin, plus the fatty layer right under the skin. That is why calories can look wildly different depending on what you actually ate. If you want a quotable rule of thumb: pick a cut first, then pick skin on or off, then log by cooked weight of meat you actually put on your plate. That simple sequence fixes most logging errors in under 30 seconds.
Here is the practical “why” behind that rule. A nutrition label or database entry often assumes a certain mix of light and dark meat, and it may or may not include skin. Your plate rarely matches that average. A quick wrap made with a few chunks of thigh plus a bit of crispy skin is a different macro profile than a meal prep bowl built from mostly breast meat that you pulled off cleanly. Even “shredded chicken” can swing, because shredding tends to mix small bits of skin and dark meat into the pile unless you separate them on purpose.
Skin on vs skin off, why calories swing fast
Most of the calorie gap comes from fat stored in the skin and the thin fatty layer right underneath it. Protein does not change much, but fat can jump quickly, and fat carries 9 calories per gram. For a real reference point, roasted chicken breast with skin lists 197 calories per 100 g, with about 7.8 g fat and 29.8 g protein on USDA chicken skin macros. The takeaway is not that you should fear skin, it is that “I only kept a little” can quietly add a meaningful chunk of calories.
The sneaky part is that “a little skin” often turns into more than you think once you start pulling and shredding. If you shred the bird while it is still warm, skin tears into small pieces and blends into the meat pile. Later, when you scoop chicken into a bowl, you cannot easily tell what is meat versus skin bits. A simple habit that helps: separate skin first, set it aside on a different plate, then shred. If you want skin sometimes, add it back intentionally, like one small strip on top of a wrap, instead of letting it accidentally spread through three lunches.
Logging rotisserie chicken gets easy once you stop guessing. Choose breast or thigh, remove or keep skin, then weigh the cooked meat you actually eat. If it is a mixed shred, log it as thigh to stay conservative.
Breast vs thigh, two macro profiles in one bird
Breast and thigh are basically two different foods from a macro perspective. Breast is the lean, high-protein option that fits more easily into a calorie deficit, and it is usually the easiest to log accurately because it has less hidden fat. For example, roasted chicken breast meat only is commonly listed around 165 calories per 100 g with about 31 g protein (and much lower fat) on USDA breast meat only. Thigh is usually tastier and more forgiving after reheating, but it comes with more fat, which means portions matter more when you are trying to lose weight.
Here is the logging approach you will see throughout the rest of this guide: decide your cut (breast, thigh, or mixed), decide skin on or skin off, then log by cooked weight. Cooked weight keeps things consistent because rotisserie chicken is already cooked, and the bones are already removed before it hits your plate. If you are building a simple meal prep bowl, you might do 150 g breast meat (skin off), microwavable rice, and a big handful of bagged salad. If you are making a quick wrap, you might use 120 g thigh meat (skin off or on), add Greek yogurt ranch, and call it done.
One more practical note: rotisserie chicken is often saltier than plain home-cooked chicken, which can affect scale weight and day-to-day water retention even if fat loss is still on track. If you track sodium and potassium, your weigh-ins usually make more sense, especially after a salty dinner. CalMeal users often pair chicken logging with sodium and potassium logging so they can spot the difference between “I ate more calories” and “I ate more salt.” If you have blood pressure or kidney concerns, check with your clinician about what sodium intake makes sense for you.
Skin on vs off macros by cut and weight
Skin on or skin off changes your numbers fast, and it is mostly a fat story. The meat itself (breast or thigh) stays high-protein either way, but the skin adds extra fat grams that quietly raise calories. To keep this simple and consistent, the table below uses a practical logging unit: 100 g cooked chicken (about 3.5 oz cooked). If you normally log 3 oz cooked (85 g), you can estimate by multiplying the table numbers by 0.85. Example: 100 g breast meat-only is about 165 calories, so 3 oz cooked is about 140 calories. This lets you stay accurate without doing math every meal.
These are “typical cooked” macros, not a promise, because rotisserie birds vary. Size of the chicken, how much skin you actually eat, how much visible fat stays attached, and even how moist the meat is can shift the final grams on your plate. USDA-style nutrition databases report averages for edible portions, and they also point out that real foods have natural variability across samples and preparation details, which is why tracking is always an estimate, not a lab test. If you want the most defensible approach, pick the closest entry (breast vs thigh, skin eaten vs not), stick with it, and adjust only if your progress trends say you need to.
Macro comparison table, choose your default entry
Use this as your quick reference for cooked, roasted chicken. The numbers line up with common USDA nutrition profiles for roasted chicken cuts, and the key takeaway is the gap between “meat only” and “with skin.” To reduce decision fatigue, choose one default entry for each cut you eat most (for many people it is “breast only” or “thigh only”), then use the same entry all week. Consistency beats perfection in real life. If you sometimes eat skin and sometimes do not, log the version you actually ate that meal, but keep your weighing method consistent (cooked weight, not raw).
| Food | Calories | Protein-Fat |
|---|---|---|
| Breast only 100g | 165 | 31P 3.6F |
| Breast + skin 100g | 197 | 30P 7.8F |
| Thigh only 100g | 209 | 26P 10.9F |
| Thigh + skin 100g | 232 | 23P 14.7F |
How to pick the right entry in your tracker: if you peel the skin off before eating (or you buy the pre-pulled meat someone else already skinned), log the meat-only line. If you eat the skin, even “just some,” it is safer to log the with-skin line unless you are deliberately removing most of it. In CalMeal or any tracker, the best match usually includes words like “cooked, roasted” and specifies “meat only” or “meat and skin.” If your app only offers generic “rotisserie chicken,” compare its calories per 100 g to the table and choose the closest.
A simple strategy for weight loss is to keep protein high while controlling calorie density. Breast meat-only is the easiest “set it and forget it” option because the protein-to-calorie ratio is excellent. Thigh meat can still fit a cut, it just benefits from slightly tighter portions. One practical example: if you build a quick lunch bowl with 150 g cooked chicken, microwave rice, and bagged salad, switching from thigh with skin to breast meat-only can save roughly 100 calories for the same weight of chicken. Protein is also the macro that tends to keep you full, and it costs more energy to digest than carbs or fat, which you can read about in protein thermic effect benefits.
Common logging mistake, mixing cuts when you shred
The biggest accuracy problem with rotisserie chicken is shredding the whole bird into one container, then logging every serving as “breast.” That usually under-logs fat and calories because shredded chicken often includes a mix of breast, thigh, and bits of skin. It is extra easy to do if you are meal prepping fast and you do not want to waste food. If your tracking feels “off” even though you swear you are weighing portions, this is one of the first places to look. The fix is not to become obsessive, it is to separate the chicken once so your future logging stays clean and consistent.
Easy fix that takes about 3 minutes: pull the breasts off first and shred them into a “white meat” container. Then pull the thighs and legs into a “dark meat” container, and decide right then if you are keeping skin attached or discarding it. Label the lids (example: “Breast, meat only” and “Thigh, with skin”). Now, all week, you can scoop, weigh, and log the matching table line without guessing. If you want to be extra consistent, weigh portions in cooked grams every time and use the same scale spot on your counter. For more on why macro numbers vary in food databases and why averages are used, see the USDA FoodData Central documentation.
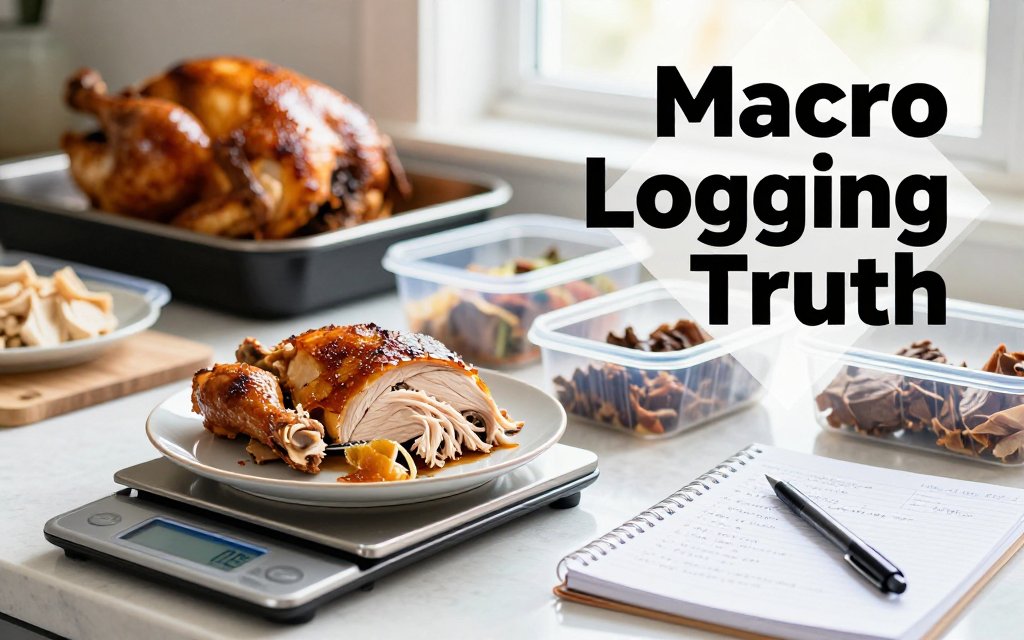
How to log Costco rotisserie chicken accurately
Rotisserie chicken is one of the easiest proteins to eat, and one of the easiest to log incorrectly. The big reason is that you are not logging a single “ingredient,” you are logging a mix of parts (breast, thigh, skin, and sometimes a little gelatinous juice) that can change bite to bite. Even official nutrition data shows there is real variability across rotisserie products compared with standard roasted chicken, which is why two database entries can look “close,” but still be off for fat and sodium. That is also why I prefer building a simple, repeatable method that you can do the same way every time, instead of hunting for the perfect entry. The goal is consistency first, then precision. If you want a deeper nerdy dive on how rotisserie chicken nutrient profiles were evaluated in a lab setting, this USDA rotisserie study is a helpful reference point. (ars.usda.gov)
Weigh it cooked, then log in grams
Use cooked weight as your default for rotisserie chicken. You are eating it cooked, and cooked weight is what stays consistent across your portions, especially after it has sat in the container and reabsorbed juices. Here is a simple routine you can repeat: decide “skin on” or “skin off” first, then remove the skin before you weigh anything if you are going skin off. Next, pull the meat off the bones (or shred it), put a bowl on your scale, hit tare, and add chicken until you reach the portion you want. Log that exact gram amount in your tracker (CalMeal or any app), using an entry that matches your choice, meat only or with skin, cooked. This removes most of the guesswork and prevents the classic mistake of logging bone weight or comparing a cooked portion to a raw entry.
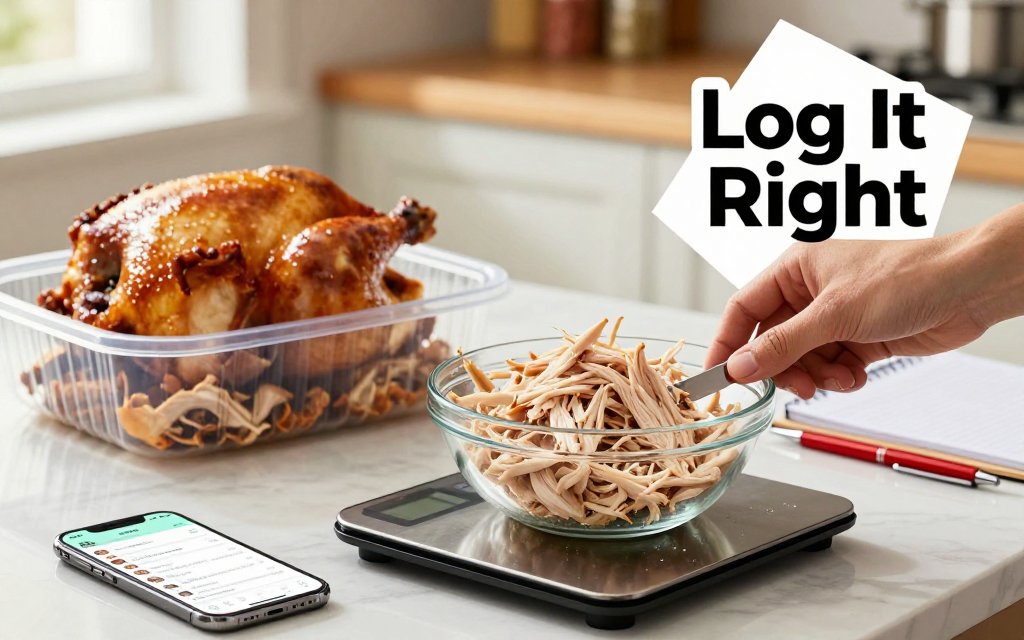
A practical shortcut that saves time all week is to weigh once per container, then “serve” it later without rethinking it. After you pull all the edible meat, weigh the total grams of your shredded chicken and store it as a custom food or recipe called something like “rotisserie chicken, meat only, cooked.” Example: if the total shredded meat comes to 780 g, and you scoop out 130 g for lunch, you already know that is 130 out of 780, which is one sixth of the batch. In most trackers, you can set the recipe yield to 780 g and then log “130 g” directly, or set 6 servings and log 1 serving. Either way, you get consistent macros without needing to re-scan or re-search every time.
Good enough rule: log the edible meat you actually ate, in grams. If you are unsure, pick one entry (meat only or with skin), weigh what is left later, and adjust tomorrow. Do not stress the rest.
Photo logging and label matching, when you are not at home
If you are eating at work, in the car, or standing at the counter pulling off pieces like a raccoon (no judgment), use a two-step log: quick now, accurate later. Step 1 is a fast photo so you remember what you actually ate, especially if it was a mix of breast plus a wing plus “a little more.” Step 2 is a rough portion estimate so you have something on the books: use hand cues like “one palm of shredded chicken” (often around 85 to 120 g depending on your hand and how packed it is) and log that. Then, when you are home at dinner, reconcile: weigh a normal portion on the scale and compare it to what your “palm” looked like in the photo, then adjust your earlier entry if needed.
Label matching is helpful, but be picky. Barcode and community entries vary a lot, and the wording matters more than people think. Prioritize entries that clearly say cooked and specify either meat only or meat and skin. If the label lists a serving like “3 oz,” confirm whether it means 3 oz of edible portion (meat) or 3 oz including skin, because that changes fat fast. Also check the unit: some entries list nutrition per 85 g, some per 100 g, and some per “1/4 chicken,” which is ambiguous unless you are eating quartered pieces with similar ratios. My rule: if an entry does not clearly match what is on your plate, do not force it. Choose a simpler cooked per-gram option and keep moving.
Sauces, drippings, and piece-by-piece eating
Rotisserie chicken gets sneaky when extra fat or sugar rides along for free. If you eat the skin, log with-skin, because that is where most of the added calories live. If you remove the skin but you are also spooning the drippings over your bowl of chicken and rice, treat that liquid like a sauce, not like “zero.” A simple approach is to log your chicken as usual (meat only), then add a small add-on if you used the juices heavily, for example 1 teaspoon of oil or 1 tablespoon of pan drippings in your tracker as a conservative placeholder. Same idea for BBQ sauce, ranch, or buffalo: measure it (tablespoon or grams) and log it separately. This keeps your protein tracking clean while still accounting for the stuff that usually derails fat and calories.
For the “wing here, thigh there” problem, use a method that matches how you snack. Option A is the difference method: put a bowl on the scale, tare it, and toss in the edible meat you plan to eat while you pick, then eat from that bowl. Whatever was in the bowl is what you log, and the bones never touch the scale. Option B is to keep one default entry for snacks, for example “rotisserie chicken, meat only, cooked,” and set a personal standard snack portion like 75 g. Each time you grab a few bites, you log 75 g, and if you do it twice you log it twice. You will not be perfect, but you will be consistent, and consistency is what makes calorie and macro tracking work over weeks.
Sodium, scale weight, and smart deficit strategy
You can nail your calories and macros at dinner, wake up the next morning, and still see the scale jump after rotisserie chicken. That does not automatically mean fat gain. It usually means the scale is temporarily measuring more water, more food still moving through your system, or both. Rotisserie chicken is convenient, but it is also typically brined or seasoned with salt, and that salty dinner can add noise to your next weigh in. The goal in a deficit is not to chase daily scale changes. The goal is to keep your weekly calorie average consistent so fat loss can show up over time.
A smart deficit strategy is to treat tomorrow morning as a data point, not a verdict. If you ate your planned calories and protein, do not “make up for it” by slashing calories, skipping breakfast, or doing extra cardio out of panic. That overcorrection often leads to hunger, cravings, and a higher chance of overeating later. Instead, keep your usual plan and look for trends across 7 to 14 days. If you weigh daily, use the same conditions (after the bathroom, before food, similar clothing) so you can see the real direction instead of random spikes.
Costco rotisserie chicken sodium, what it means for water weight
Salt changes where water sits in your body. Higher sodium intake can pull more water into your bloodstream and tissues, which can show up as puffiness and a higher scale number the next day. The American Heart Association explains that excess sodium in the bloodstream pulls water into blood vessels, increasing volume, which is one reason sodium is tied to blood pressure. See their overview on how sodium affects fluid balance. In plain English, salty meals can create a temporary “water parking lot” that hides fat loss for a day or two.
If the scale is up after a salty dinner, assume water first. Stick to your planned calories, drink water normally, and look at your 7 day average. One weigh in is noise, not a new maintenance level.
The best response is boring, which is exactly why it works. Keep hydration steady (do not chug gallons to “flush it”), and pair the chicken with potassium rich, lower sodium sides. An easy plate: rotisserie chicken plus a plain baked potato, steamed spinach, and fruit like a banana or orange. Another busy night option: chicken over no salt added microwave rice, topped with sliced avocado and a big bagged salad with oil and vinegar instead of a salty bottled dressing. Cleveland Clinic also notes that high sodium foods can cause temporary water retention and scale fluctuations in their guide on common causes of weight changes. If you have kidney disease, heart failure, or take diuretics, check with your clinician about sodium targets.
What is a realistic rotisserie chicken serving size for tracking?
For most people, a realistic, trackable serving is 4 to 6 oz (113 to 170 g) of cooked meat. Four ounces is a solid “protein anchor” for weight loss, and 6 oz fits well for active lifters or higher protein targets. The key is consistency: pick a default portion you can repeat most days. If you are eating skin on, log skin on. If you remove skin, log skinless. If you go back for seconds, log a second serving instead of guessing bigger numbers once.
How do I log rotisserie chicken if I ate mixed pieces?
Mixed pieces are normal, and you do not need a perfect breakdown to get results. Use one of two methods: the “weigh and average” method (weigh the total cooked meat you ate, then log it as a generic rotisserie chicken meat entry), or the “bias conservative” method (if you had thigh plus drumstick plus some breast, log it as dark meat to avoid undercounting). If some bites had skin, log skin on for the whole portion or add a small skin entry to cover it.
Why did my weight go up after Costco rotisserie chicken?
Most of the time it is water weight, not fat. Sodium can increase short term water retention, and rotisserie chicken is often salty. Also, a high protein dinner can come with more total food volume (meat, sides, fluids), which literally weighs something until it is digested. Real fat gain requires a sustained calorie surplus over time, not one normal dinner that fit your plan. Your best move the next day is to eat your usual deficit, prioritize fiber and potassium rich foods, and give it 24 to 72 hours for the scale to settle.
Ready to track your nutrition with less guessing and more accuracy? Download CalMeal for free and start logging today with AI-powered food recognition that helps you capture portions and macros faster. It is an easy way to stay consistent, whether you eat skin-on, meat-only, breast, or thigh. Get CalMeal now on iOS or Android.
Start Tracking Your Nutrition Today
Download CalMeal for free and take the guesswork out of calorie counting with AI-powered food recognition.